### 第一步 搭建环境
verilog有两个比较常用的编译器:
1. Icarus Verilog
2. VeriWell Verilog Simulator
ubuntu源里面默认的是Icarus Verilog,安装编译器:
sudo apt-get install verilog 然后再安装模拟器,用来查看波形的软件:
sudo apt-get install gtkwave 这样就ok了 ### 第二步 写一个简单的与门 and.v
module add(a, b, c);
input a;
input b;
output c;
assign c = a & b;
endmodule ok了,再写一个testbench,用来测试刚才的与门是否正常工作: test_and.v
`timescale 1ns/1ns
module test_and;
reg a;
reg b;
wire c;
add t(a, b, c);
initial
begin
$dumpfile("test.lxt");
$dumpvars(0, test_add);
$dumpvars(0, t.a, t.b, t.c);
end
initial
begin
#10 a = 1; b = 0;
#10 a = 0; b = 1;
#10 a = 0; b = 0;
#10 a = 1; b = 1;
#50 $finish;
end
initial
$monitor("a = %d, ", a, "b = %d, ", b, "c = %d\n", c);
endmodule ### 第三步 编译运行和查看波形 在命令行下执行:
iverilog -o my_and and.v test_and.v 执行完后会生成一个名为my_and 的文件,./my_and就能运行,如图: 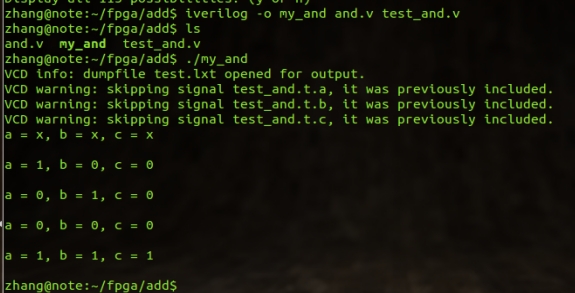 这个命令跟gcc很像,当然后期你也可以用MakeFile来写编译依赖关系。
vvp -n my_and -lxt2 之后就会生成一个test.lxt的文件
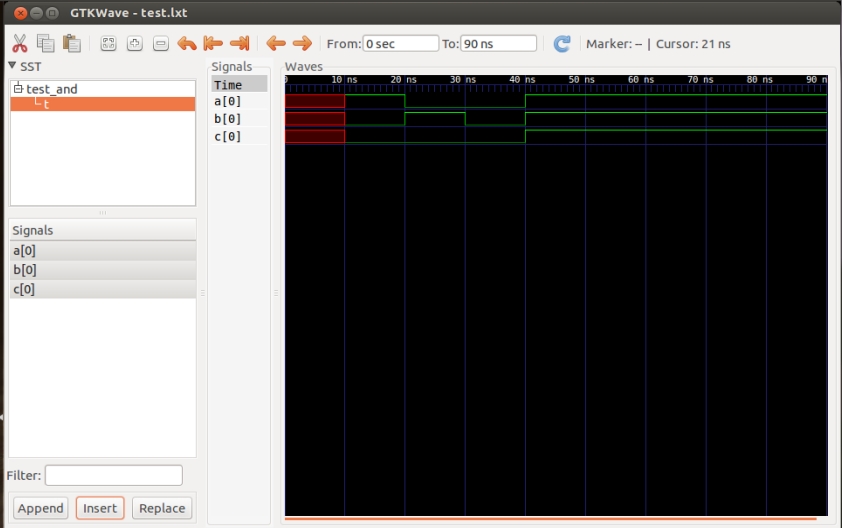
gtkwave test.lxt 然后选择t,同时选中a[0], b[0], c[0], 点击Insert, 就能看到波形了:结果如图: